
一、什么是SpringBoot starter机制
SpringBoot中的starter是一种非常重要的机制(自动化配置),能够抛弃以前繁杂的配置,将其统一集成进starter,应用者只需要在maven中引入starter依赖,SpringBoot就能自动扫描到要加载的信息并启动相应的默认配置。
starter让我们摆脱了各种依赖库的处理,需要配置各种信息的困扰。SpringBoot会自动通过classpath路径下的类发现需要的Bean,并注册进IOC容器。SpringBoot提供了针对日常企业应用研发各种场景的spring-boot-starter依赖模块。
所有这些依赖模块都遵循着约定成俗的默认配置,并允许我们调整这些配置,即遵循“约定大于配置”的理念。
二、为什么要自定义starter
在我们的日常开发工作中,经常会有一些独立于业务之外的配置模块,我们经常将其放到一个特定的包下,然后如果另一个工程需要复用这块功能的时候,需要将代码硬拷贝到另一个工程,重新集成一遍,麻烦至极。
如果我们将这些可独立于业务代码之外的功配置模块封装成一个个starter,复用的时候只需要将其在pom中引用依赖即可,SpringBoot为我们完成自动装配,简直不要太爽
三、什么时候需要创建自定义starter
在我们的日常开发工作中,可能会需要开发一个通用模块,以供其它工程复用。SpringBoot就为我们提供这样的功能机制,我们可以把我们的通用模块封装成一个个starter,这样其它工程复用的时候只需要在pom中引用依赖即可,由SpringBoot为我们完成自动装配。
常见场景: 1.通用模块-短信发送模块 2.基于AOP技术实现日志切面 3.分布式雪花ID,Long-->string
四、自定义starter的开发流程
自定义starter的开发流程:
- 创建Starter项目
- 定义Starter需要的配置类(Properties)
- 编写Starter项目的业务功能
- 编写自动配置类
- 编写spring.factories文件加载自动配置类
- 打包安装(推送到私服/中央仓库)
- 其它项目引用
五、命名规范
SpringBoot官方命名方式 格式:spring-boot-starter-{模块名} 举例:spring-boot-starter-web 自定义命名方式 格式:{模块名}-spring-boot-starter 举例:mystarter-spring-boot-starter
六、正式开始
一、使用idea创建一个springBoot项目(版本小于3.0)
默认在Idea系统设置配好了本地的maven环境
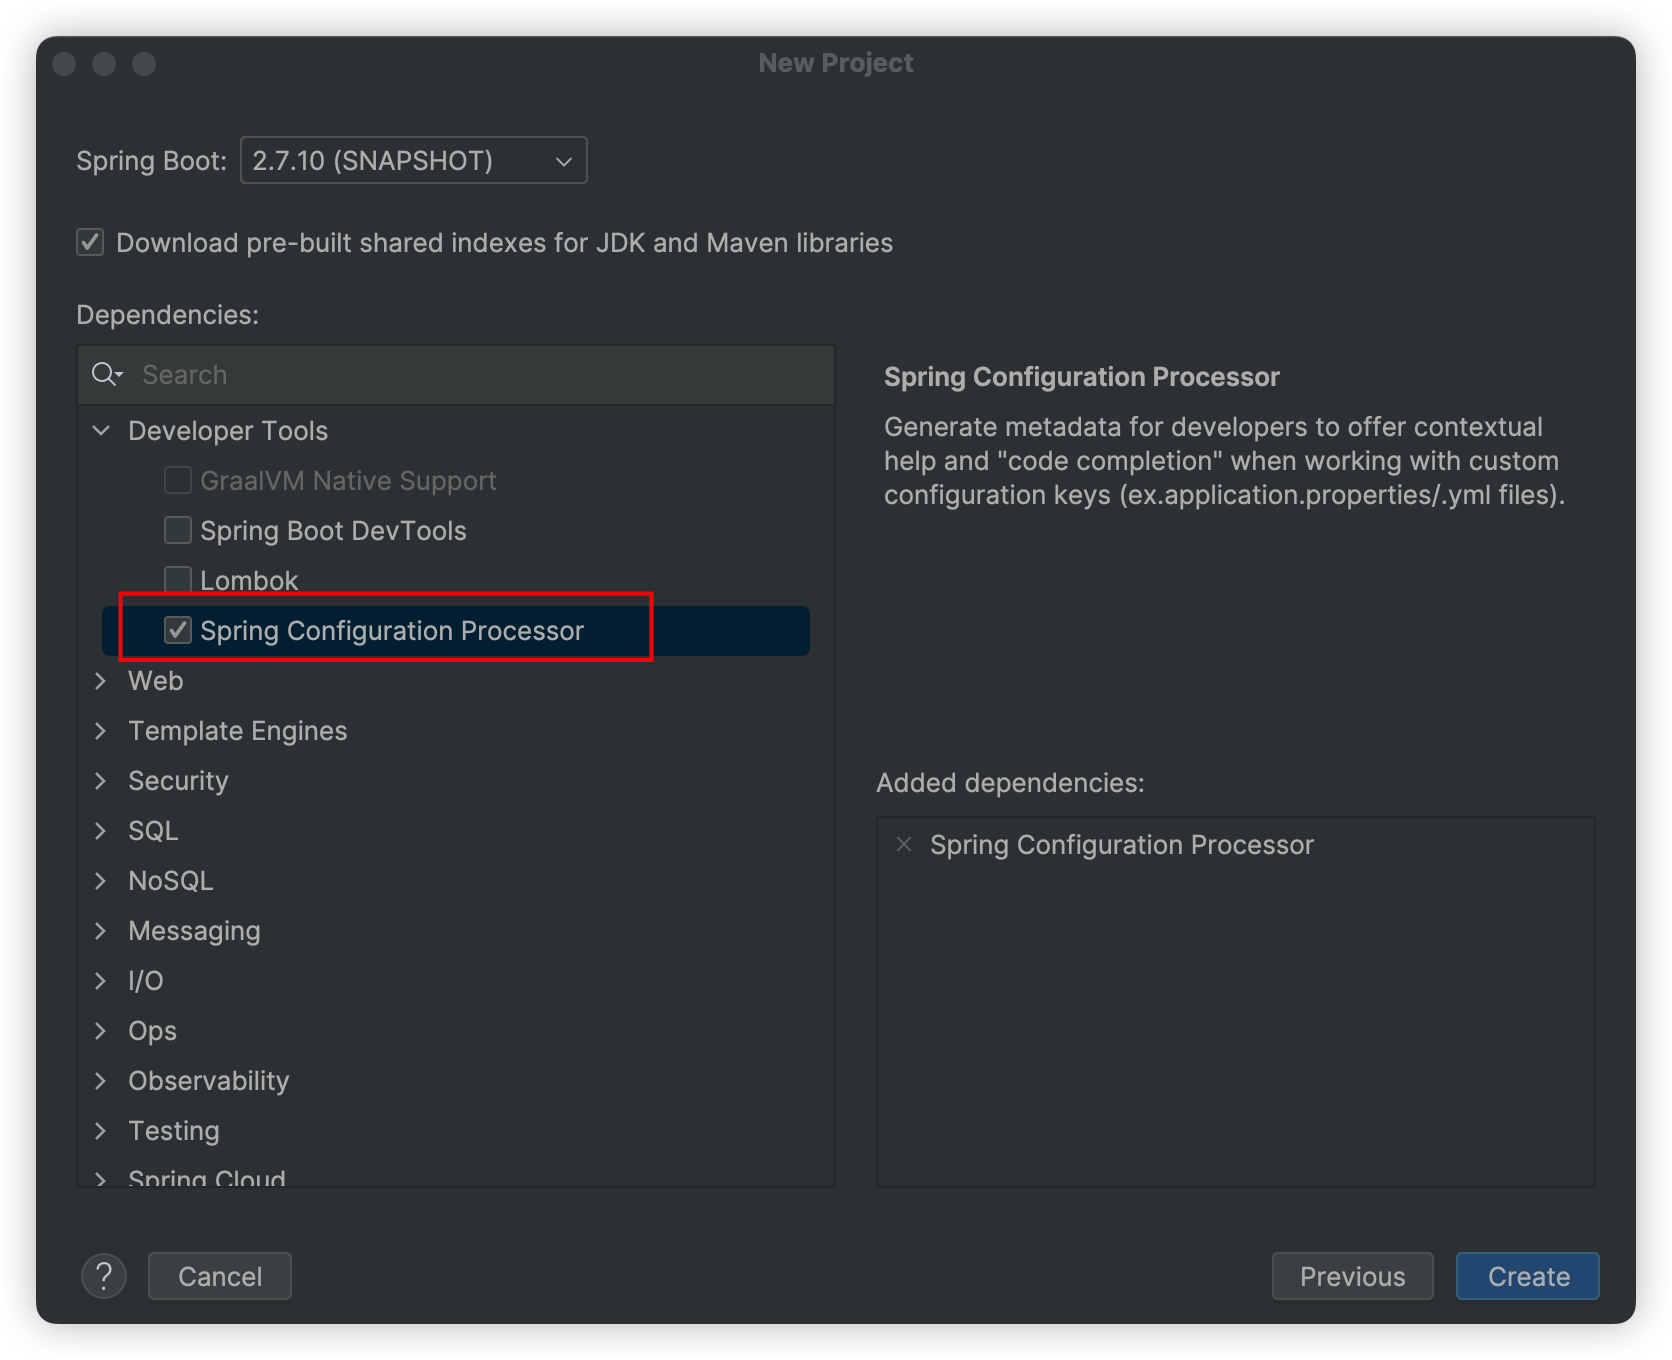
勾选下图必要依赖
二、编写相关属性配置类
/**
 * 统一sms作为配置前缀
 */
@ConfigurationProperties(prefix = "sms")
@Configuration
public class SmsProperties {
    /**
     * 应用id
     */
    private String appId;

    /**
     * 应用秘钥
     */
    private String secretId;

	//省略get/set
}三、服务提供类
/**
 * The interface Sms service.
 */
public interface ISmsService {
    /**
     * Send msg.
     *
     * @param phone the phone
     * @param msg   the msg
     */
    void sendMsg(String phone, String msg);
}@Component
public class ISmsServiceImpl implements ISmsService, Serializable {
@Autowired
SmsProperties smsProperties;
Logger logger = LoggerFactory.getLogger(ISmsServiceImpl.class);
@Override
public void sendMsg(String phone, String msg) {
logger.info(String.format("appid:%s", smsProperties.getAppId()));
logger.info(String.format("secret:%s", smsProperties.getSecretId()));
logger.info(String.format("成功给%s发送短信:%s", phone, msg));
}
}四、配置自动装配类
方式一:手动创建相关对象交友ioc容器进行管理
/**
 * @author bigtian
 */
@Configuration
@EnableConfigurationProperties({SmsProperties.class})
public class SmsAutoConfig {
    /**
     * 此注解是当bean容器里面没有这个bean的时候才会注入,也就是说不会覆盖掉用户自己定义的bean
     */
    @ConditionalOnMissingBean(ISmsService.class)
    @Bean
    public ISmsService smsProperties() {
        return new ISmsServiceImpl();
    }
}方式一:使用spring相关特性
/**
 * @author bigtian
 */
@Configuration
/**
*配置需要交由ioc管理的bean对象包路径
*此方法必须配合相关注解如:@Component、@Service等交由ioc管理的注解
*不能扫描到类上面标注了@ConditionalOnMissingBean的嘞
*/
@ComponentScan(basePackages = {"club.bigtian.sms.*"})
public class SmsAutoConfig {
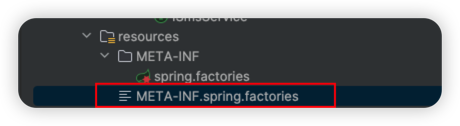
}五、编写spring.factories文件加载自动配置类
在resources目录下新建一个META-INF文件夹,然后创建spring.factories文件
编辑spring.factories文件
切记不可一次性创建完成,下图标注的是错误的
配置规则
规则:`多个自动配置类可以用逗号和\隔开`
org.springframework.boot.autoconfigure.EnableAutoConfiguration=\
  自动配置类全路径

示例:

单个:
org.springframework.boot.autoconfigure.EnableAutoConfiguration=\
club.bigtian.sms.config.SmsAutoConfig

多个:
org.springframework.boot.autoconfigure.EnableAutoConfiguration=\
club.bigtian.sms.config.SmsAutoConfig,\
club.bigtian.sms.config.SmsAutoConfig六、打包测试
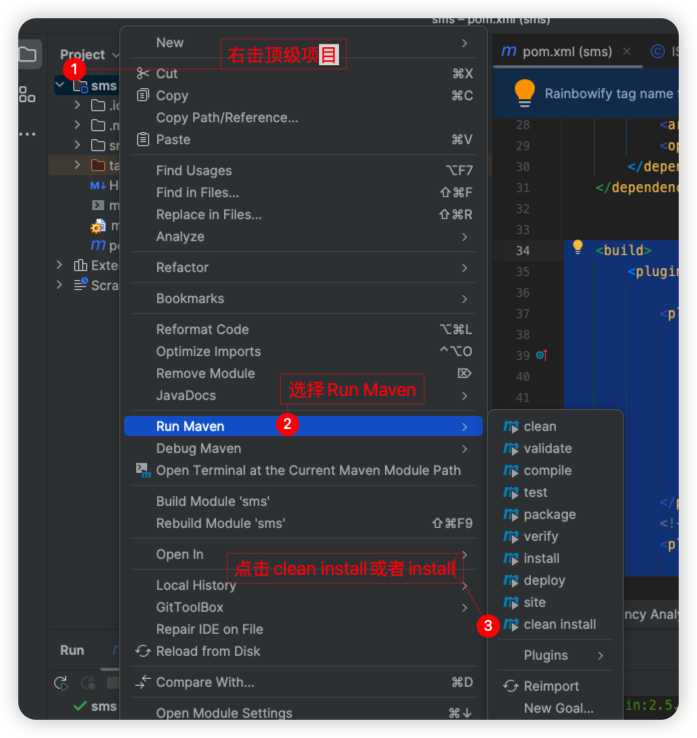
一、打包
1、在pom.xml中加入以下下配置
	<build>
		<plugins>
			<plugin>
				<groupId>org.apache.maven.plugins</groupId>
				<artifactId>maven-compiler-plugin</artifactId>
				<version>3.10.1</version>
				<configuration>
					<encoding>utf-8</encoding>
					<source>8</source>
					<target>8</target>
				</configuration>
			</plugin>
			<!-- 生成java source.jar -->
			<plugin>
				<groupId>org.apache.maven.plugins</groupId>
				<artifactId>maven-source-plugin</artifactId>
				<version>2.2.1</version>
				<executions>
					<execution>
						<id>attach-sources</id>
						<goals>
							<goal>jar-no-fork</goal>
						</goals>
					</execution>
				</executions>
			</plugin>
		</plugins>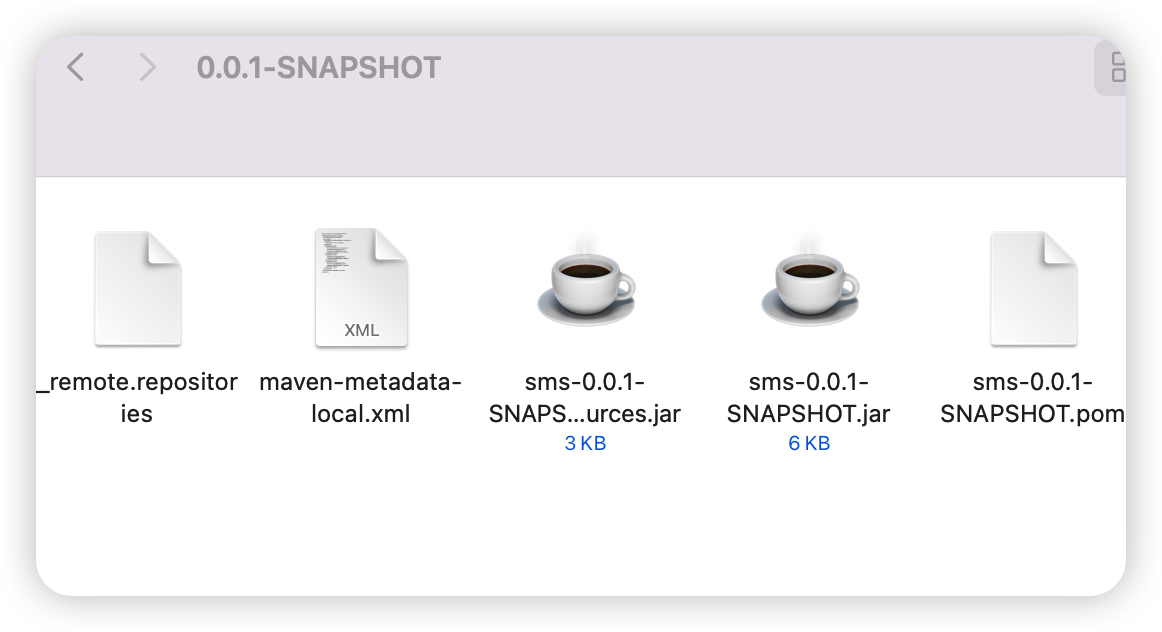
</build>2、使用maven打包到本地仓库
稍等片刻后就会把starter打进本地仓库,如下图就已经成功了
二、测试starter
1、新建一个新的spring boot项目
2、在pom.xml中引入manven坐标
		<dependency>
			<groupId>club.bigtian</groupId>
			<artifactId>sms</artifactId>
			<version>0.0.1-SNAPSHOT</version>
</dependency>3、配置yml
sms:
  app-id: 2134123
secret-id: secretId4、启动程序

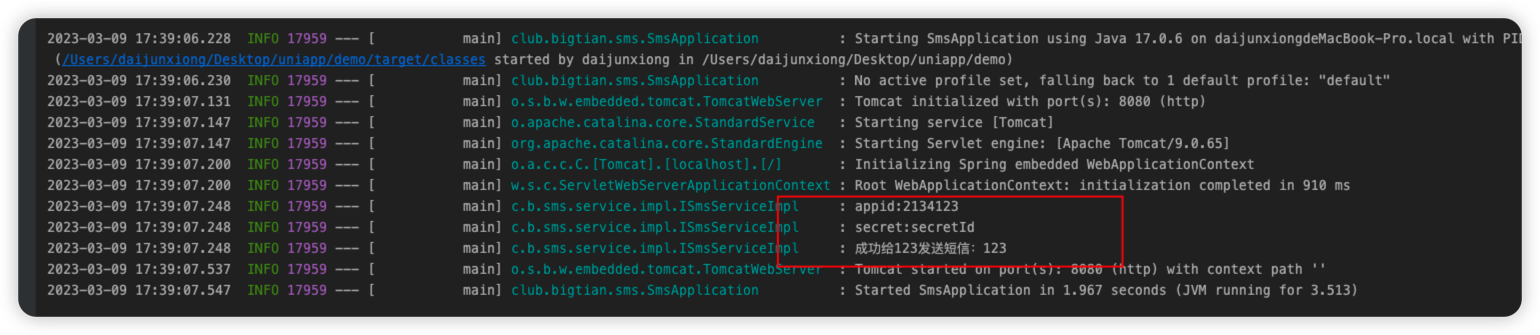
如上图输出便是成功了,本章结束
二、Starter打包到私服/中央仓库
前提
到此默认自定义starter已经成功,接下来是基于上方做些配置
一、安装私服
docker run -d -p 8081:8081 --name nexus sonatype/nexus3启动后登录默认用户名为admin密码需要进入docker/liunx相对应的文件查看
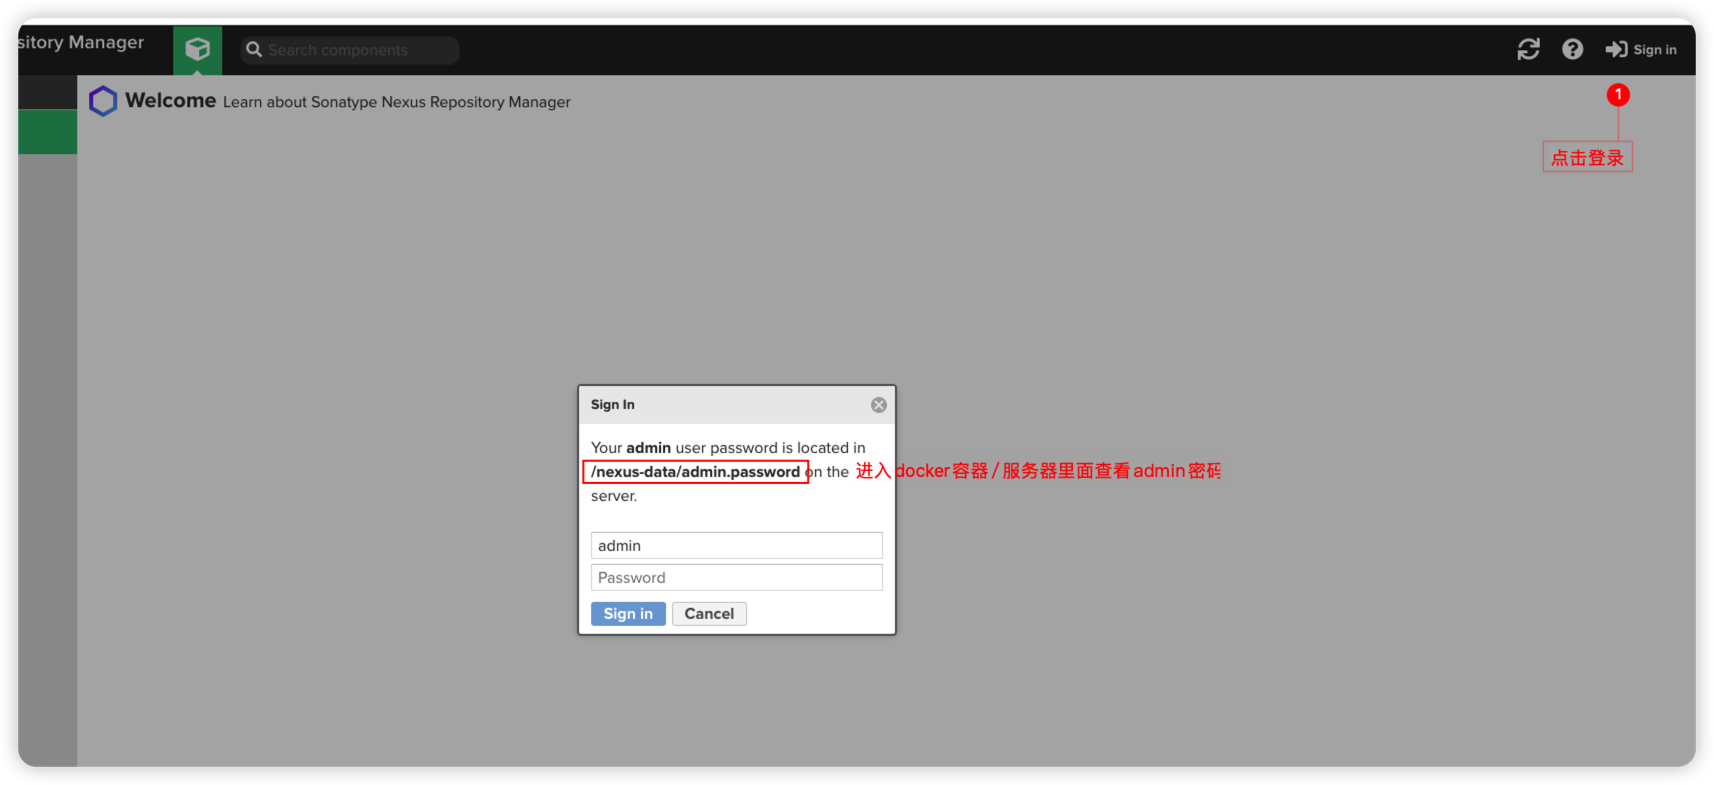
二、配置maven settings.xml文件
  <servers>
    <server>
        <id>id(建议以releases、snapshots命名)</id>
        <username>私服账号</username>
        <password>私服密码</password>
    </server>
</servers>三、获取推送仓库链接
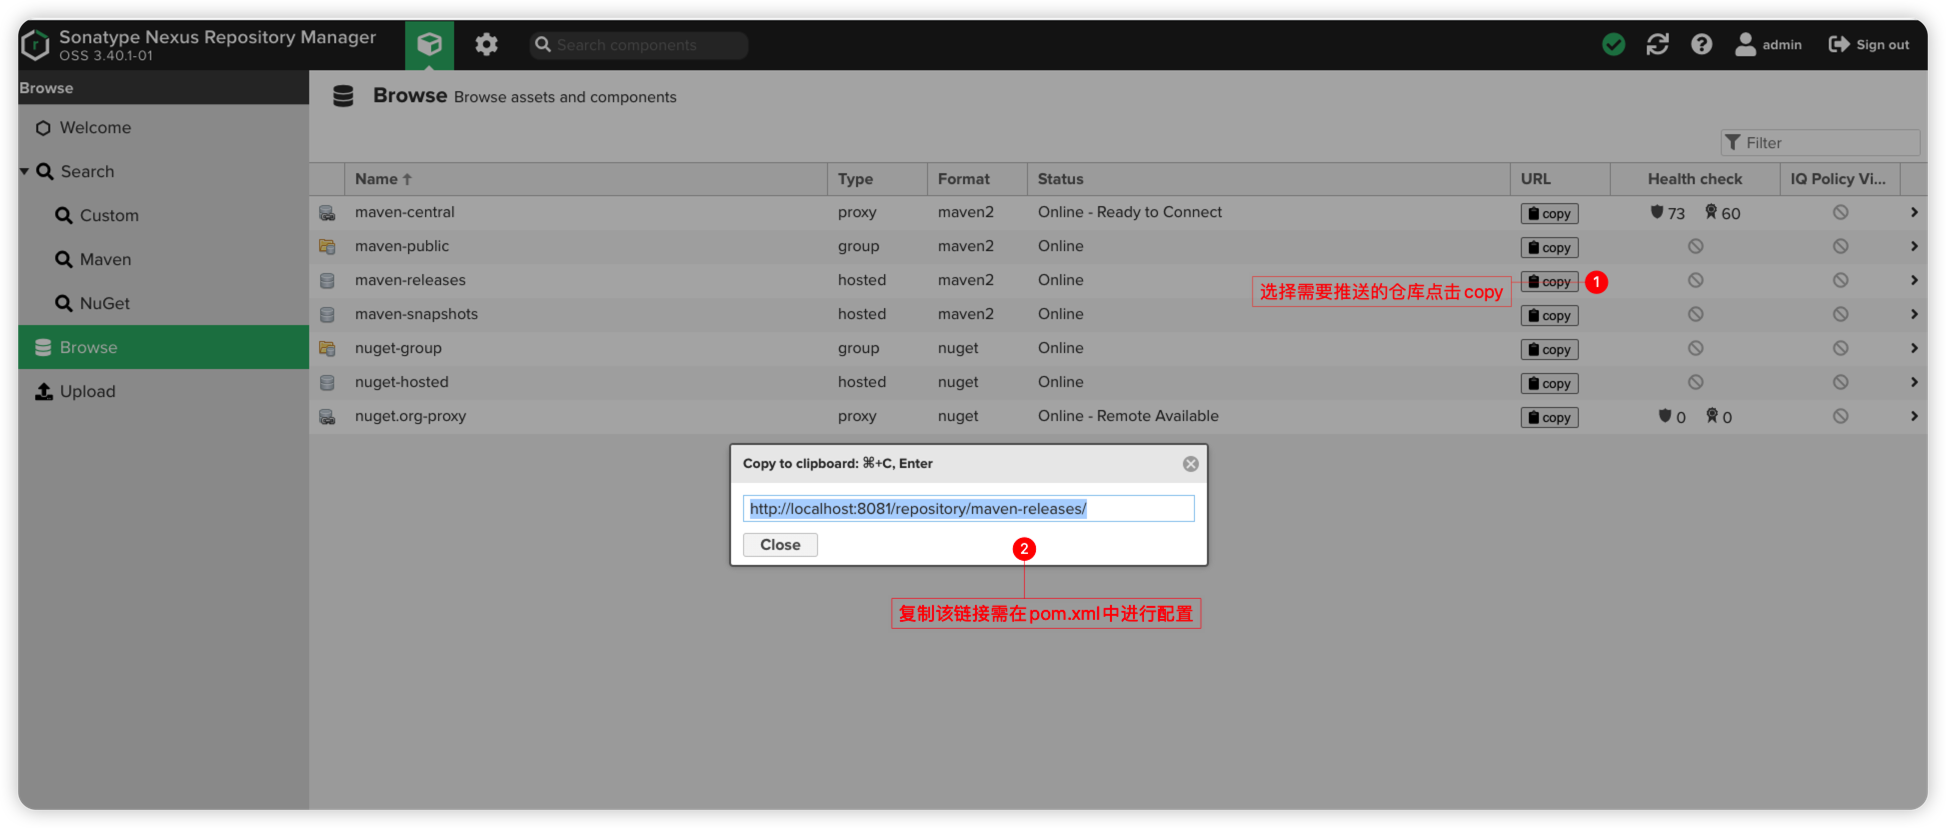
四、配置pom.xml
       <!--配置远程推送仓库相关信息-->
    <distributionManagement>
        <repository>
            <id>需与第二步的id一致</id>
            <name>随意取名</name>
            <url>第三步的仓库链接</url>
        </repository>
    </distributionManagement>

    <!--	配置私服地址-->
    <repositories>
        <repository>
            <id>releases</id>
            <name>releases</name>
            <url>第三步的仓库链接</url>
            <releases>
                <enabled>true</enabled>
            </releases>
        </repository>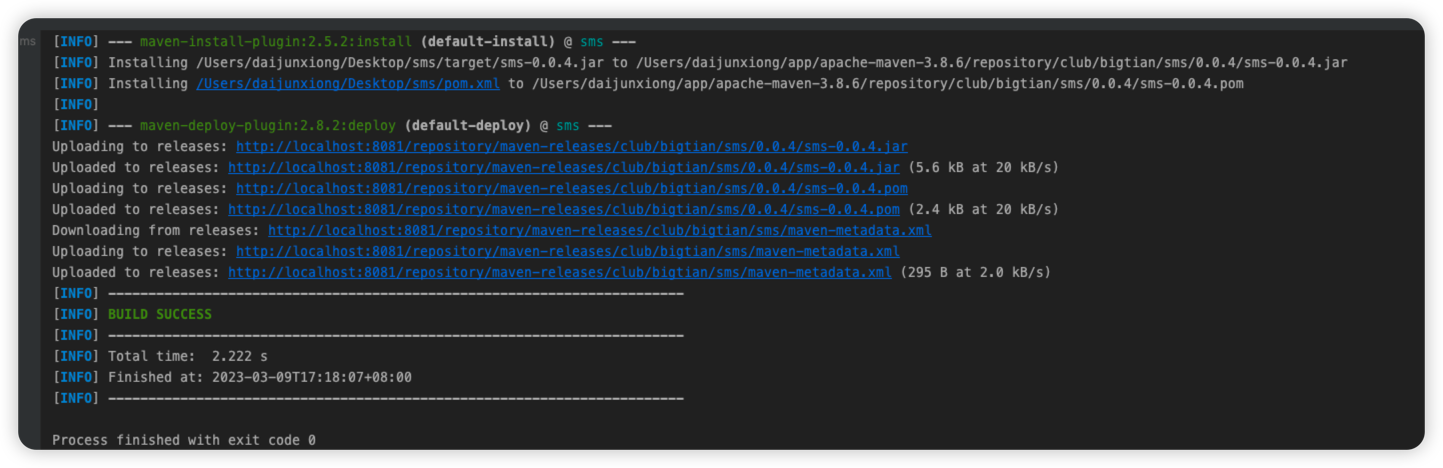
</repositories>五、打包进私服
1、执行命令mvn deploy之后等待打包程序执行完成,如下图所示即为成功
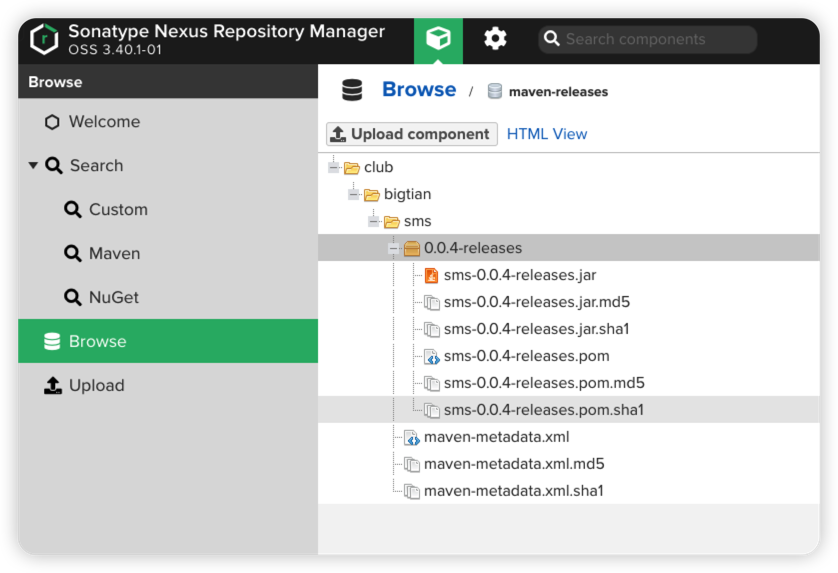
2、进入私服查看对应的仓库内容
3、清除本地仓库的相关jar包
4、进入idea刷新Maven依赖
5、启动项目看日志输出,如下图所示即为成功
本章教程结束,下次再见👋🏻